Nevermind
Holiday Chinese Steamed Buns
Share
San Francisco, CA

Holiday Chinese Steamed Buns

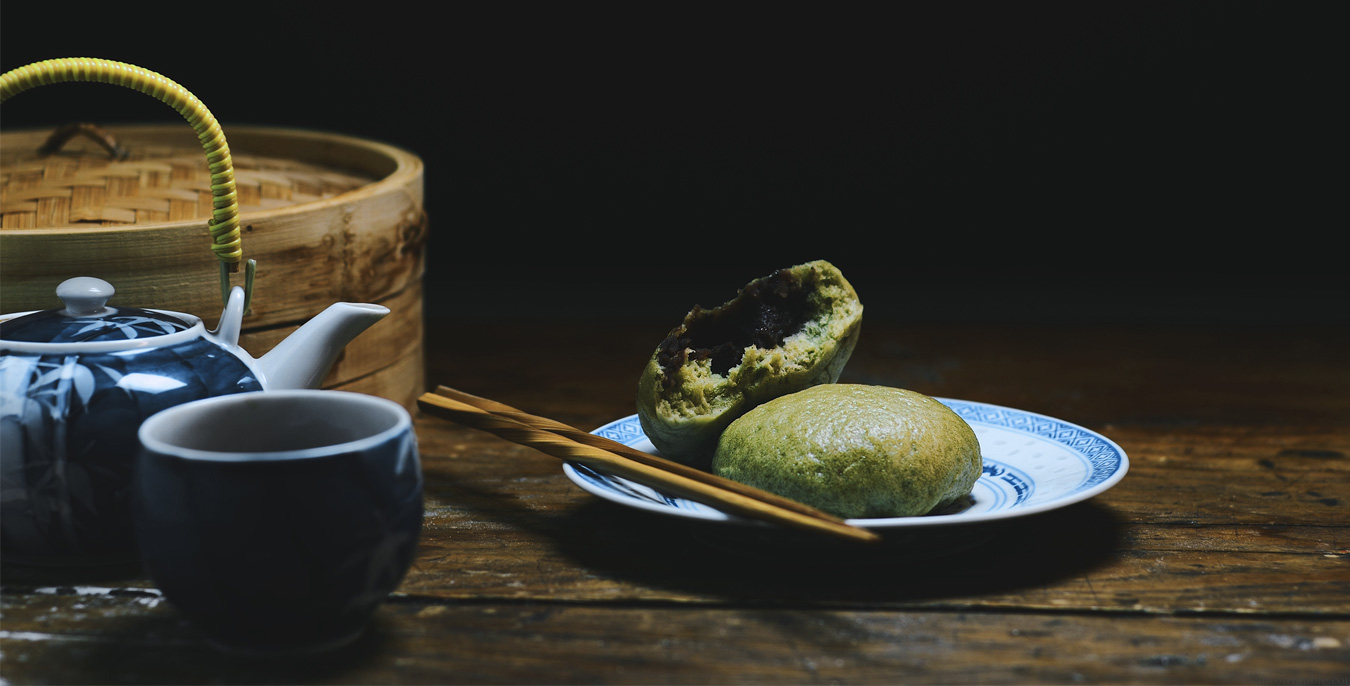
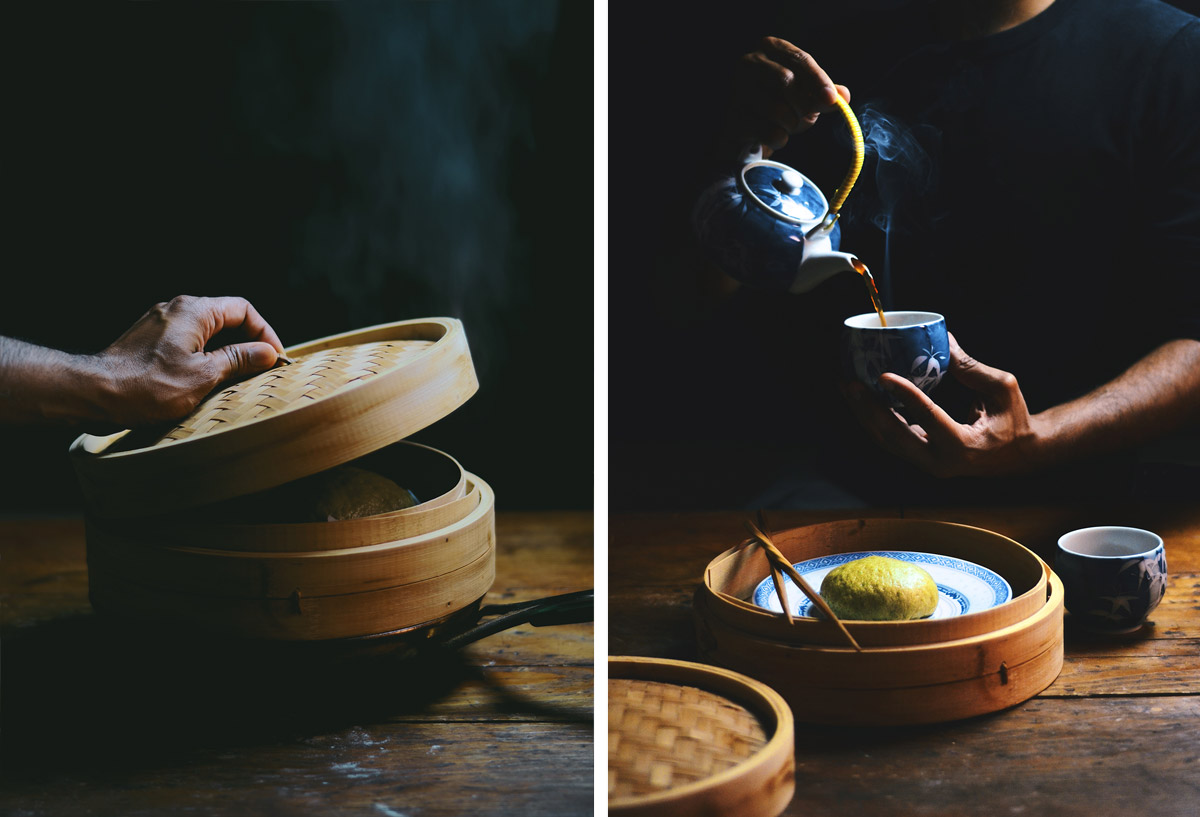
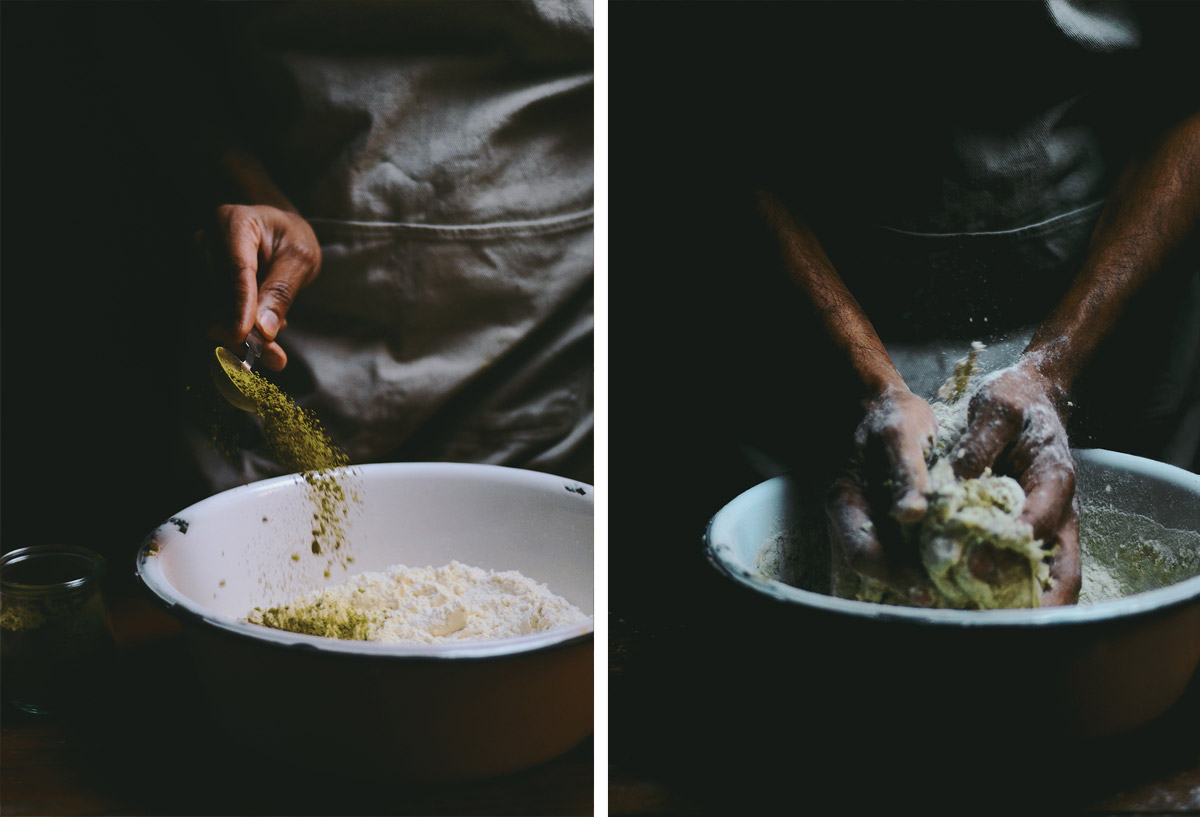
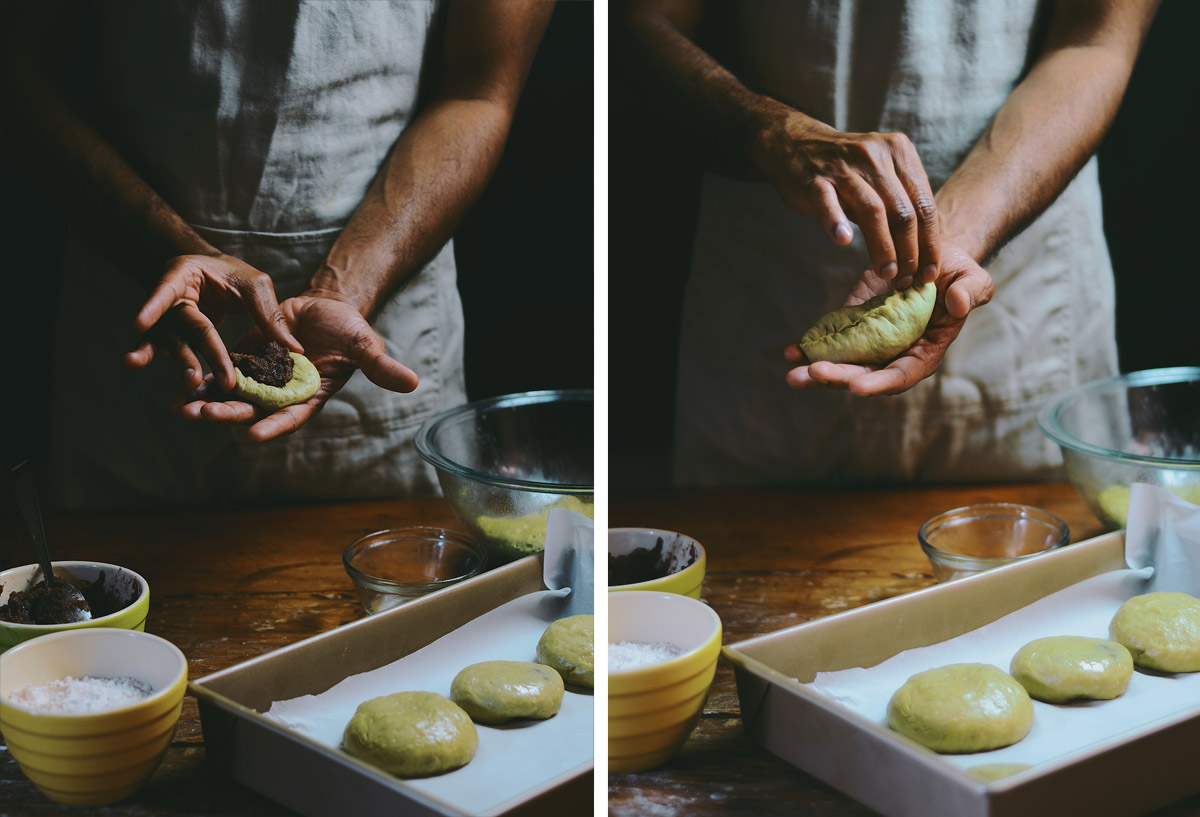
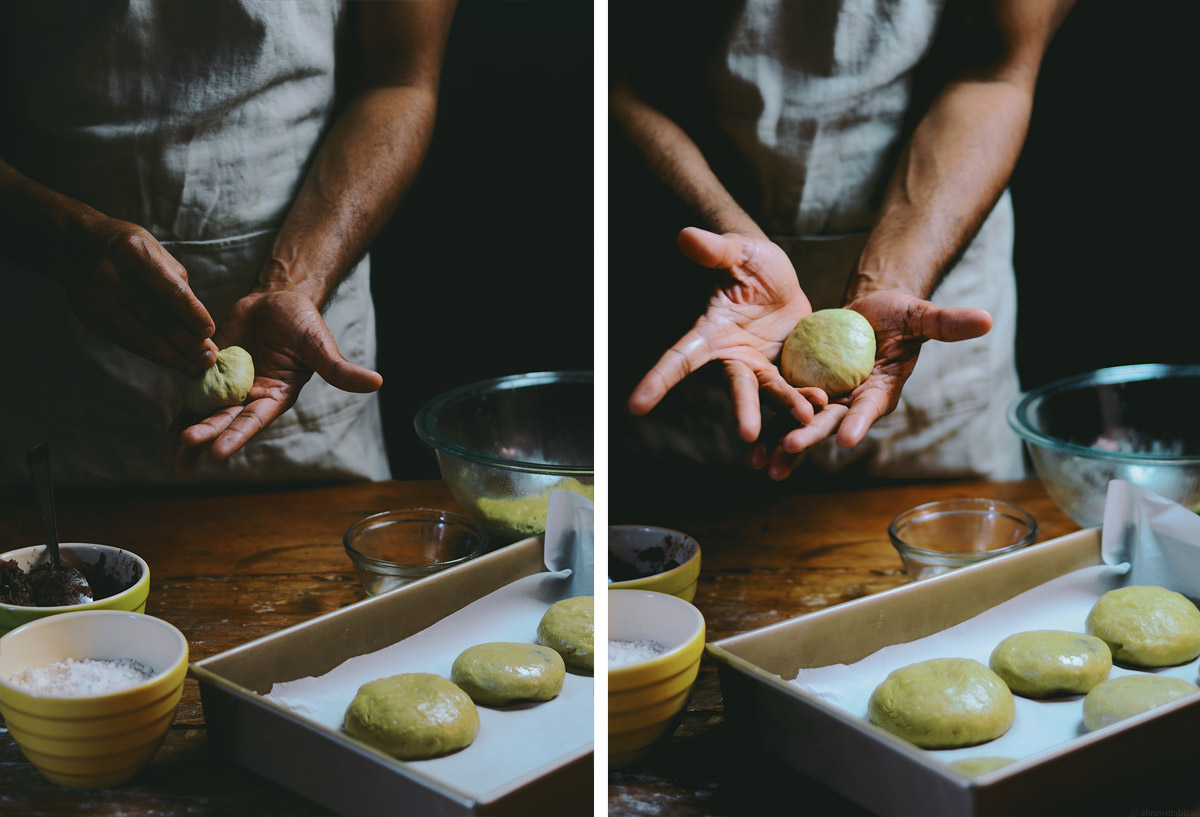
Though it is prepared many different ways, you can find bread of some variety in just about every culture across the globe. I think of bread as a unifying element in food culture. And it was also one of the first things I learned to make in the kitchen, so it should come as no surprise that it is also one of my favorite things to prepare during the holiday season.  These steamed Chinese buns fall right into that category of holiday breads that I love to serve at breakfast or at tea. Green on the outside and red on the inside, it couldn’t be more perfect for the season. The bread of each soft and spongy steamed bun is flavored with a hint of green cardamom and matcha which wraps around a delicious filling of sweet red bean paste.

chinese-steamed-buns-DT-4

Cardamom, Matcha & Red bean Chinese steamed buns

Yields: 24 individual buns 

Ingredients:
1 cup tap water
1 1/2 teaspoons active dried yeast
1 teaspoon + 1/4 cup (1 3/4 ounces) fine granulated sugar
1/2 cup whole milk
1/2 teaspoon kosher sea salt
4 tablespoons matcha powder
1/4 teaspoon green cardamom powder, freshly ground (optional)
4 1/2 cups (1 lb 6/25 ounces) all-purpose flour
4 tablespoons vegetable oil + oil for greasing the bowl and hands
1 1/2 cups sweet red bean paste (you may end up using less than this)

  1. Take 1/2 cup water and heat it to 110F. Stir in the yeast and 1 teaspoon of sugar. Let this sit for 5 minutes until the mixture is completely frothy.
  2.  While the yeast mixture is standing, bring the remaining 1/2 cup of water, milk, salt and 1/4 cup sugar to a boil in a small saucepan on medium-high heat. Reduce to a gentle simmer and keep hot until ready to use.
  3. Place a wire rack in the center of the oven and preheat to 200F for 5 minutes, switch the oven off but keep the door shut to retain the warmth. Note: You can use either the hand method or the kitchen stand mixer method to prepare the dough.
  4. a) Hand Method: Place the matcha powder, cardamom and flour in a large mixing bowl. Dry whisk to mix the ingredients and make a well in the center. Pour the yeast mixture into the center and stir with a wooden spoon. Then quickly whisk the vegetable oil into the hot milk-water mixture and pour it into the flour. Stir with a wooden spoon until almost combined, then bring the dough together with your hands to form one large ball. There should be no visible flecks of flour and the dough should be evenly green in color from the matcha.

    b) Kitchen Stand Mixer:
    Place the matcha, cardamom and flour in the bowl and using the dough blade attachment, dry mix until ingredients are evenly mixed on low speed. Then increase the speed to medium-low and pour the yeast mixture into the dry ingredients. Now quickly whisk the oil into the hot milk-water mixture and pour it in a running stream from the side of the bowl of the stand mixer. Mix the ingredients on medium-low speed for about 1 minute and then increase the speed to medium-high until completely combined. Remove the bowl from the mixer and then using your hands bring the dough together to form one large ball of dough.
  5. Transfer the ball of dough to a large lightly greased bowl and cover loosely with a clean kitchen towel or cling film. Place in the pre-warmed oven and allow to rise and double in size for at least 1 hour. After the dough has doubled in size, remove the cloth/cling film and punch the dough to deflate. Cover and allow to rise for another 1 hour in the oven (if the oven is cool, you can preheat it again as described in step 3).
  6. After the dough has risen for the second time, divide the dough into 24 equal parts. Shape each part into a ball using your hands and keep aside covered with a clean kitchen cloth.
  7. Lightly grease your palm with a little oil. Take one part of the divided dough in your palms. Flatten the dough a little to form a thick disc about 2 to 3 inches in diameter. Place 1 tablespoon of the sweetened red bean paste in the center. Pinch the edges of the disc to seal the filling in. Then bring the two pointed ends of the bun towards each other and form a ball. Using your fingers twist and seal the bun. Carefully rotate the bun between the palms of your hands to shape the bun. Place the bun in a large tray lined with parchment paper or alternatively place the bun individually in large paper cupcake cups (the latter option makes it easier to handle the buns and cook). Cover with a clean kitchen towel or cling film. Prepare the rest of the buns and place them about 3-4 inches apart from each other. Allow the buns to rest covered and rise for 1 hour in a warm oven (as described in step3).
  8. To cook and steam the buns: Place your bamboo steamer over a wok. Pour enough water into the wok (the water level should be slightly lower than the bamboo steamer) and heat on medium-high and bring to a boil (If you don’t own a wok, you can use a saucepan that is wide enough to allow the bamboo steamer to sit on). While the water is heating, line the bottom surface of the bamboo steamer with parchment paper (it doesn’t need to be cut to size, just wide enough to allow the buns to sit). Place 3 buns (if you’re using paper cups then use directly) at a time in the bamboo steamer (this will vary depending on the size and the number of compartments in your bamboo steamer, adjust accordingly. Just remember to keep enough space between the buns as they will expand during cooking). Cover the steamer with its lid and place the steamer over the saucepan of boiling water. Allow to cook for 15-20 minutes. The cooked buns will rise and be shiny in appearance yet soft and spongy to touch. Cook the rest of the buns in the same manner. Serve the freshly steamed buns with hot tea.

Note: The freshly cooked buns can be frozen and stored for up to 3-4 weeks. As soon as the buns are frozen, allow them to cool to room temperature. Place them in an airtight freezer proof ziplock bag and freeze. To reheat, microwave each frozen bun wrapped in paper for about 30 seconds. 

Sweet Red Bean Paste 

You can use commercial canned red bean paste from any Asian market or make it at home. I used this easy recipe from my friend Nami, of Just One Cookbook. The only substitution I made to her recipe was the sugar, I halved the quantity of the ingredients listed and I used 3.5 ounces of light brown sugar instead of regular sugar to give the filling a deeper flavor. Once the paste is cooled, I pulsed it a few times using an immersion blender to make it completely smooth. You won’t end up using all of the red bean paste to fill the buns but you can save the extra and use it later in another recipe of your choosing. 

chinese-steamed-buns-DT-1 chinese-steamed-buns-DT-2 chinese-steamed-buns-DT-3
Tags:
Comments are for members only.

Our comments section is for members only.
Join today to gain exclusive access.

This story is on the house.

Life & Thyme is a different kind of food publication: we're reader-first and member-funded. That means we can focus on quality food journalism that matters instead of content that serves better ads. By becoming a member, you'll gain full uninterrupted access to our food journalism and be a part of a growing community that celebrates thought-provoking food stories.

The Editor's Note

Sign up for The Editor's Note to receive the latest updates from Life & Thyme and exclusive letters from our editors. Delivered every weekend.