Cooking Guide
For the Love of Pasta: A Starting Guide for Shapes
This guide was published in The At Home Issue of Life & Thyme Post, our limited edition printed newspaper for Life & Thyme members.
As I travel through as many corners of Italy as I can—I learn that most of my child culinary memories were not very Italian at all. Although my mom’s vodka sauce, clam sauce, and eggplant parmesan are unmatched.
Shapes are also nostalgic for me. Farfalle reminds me of my childhood when paired with a pseudo cacio e pepe. Tagliatelle is my go-to flat noodle—you can make them wide or thin, and if you want a freezer staple for any sort of ragu, this is the one. Penne was always in our pantry growing up to toss with vodka sauce, pomodoro or pesto. And garganelli is the delicate, fresh and perfectly textured variation of the most versatile shape that comes in a box.
Making pasta is my art, passion and meditation. I’m constantly evolving my craft, and that’s my favorite part about it—it’s familiar, yet different each time. There is always a better dough to be made and a more perfect sfoglia to be rolled. I have shapes I revisit often, but I’m constantly exploring the books I have, what I’ve discovered through my travels to Italy, and getting lost in late-night pasta black holes on Instagram. The latter gives me the ability to watch sfogline from all over the world; and I can confidently say no sfoglina is the same, and they have all taught me something new. But my pasta ultimately reflects my personality. I don’t tend to follow the rules, and I trust myself more than anyone else.
I learned to make pasta by sight and feel thirteen years ago. At the time, there weren’t many blogs, and cookbooks offered rigid recipes that omitted the importance of feeling the dough and humidity. The recipes were always off, too specific in cups of flour, or gave a regimented way of rolling the sheeted pasta through a hand-cranked machine. I started experimenting and blending different flours to get the texture I love so much in fresh pasta. And during quarantine, the flour shortage made me anxious, so I bought my beloved semola in bulk, ensuring I could make egg pasta, water-based pasta, and experiment in between.
On a recent trip to Vittoria, Sicily, my fiancée and I stayed at Baglio Occhipinti, researching our dream project of owning an agriturismo of our own, called Nebbiandra. On our first night, we arrived late, parked between the olive trees and were met by a young man in a chef’s coat named Luigi, who not only checked us in, but got us settled at a candlelit table perched on top of an ancient palmento. He danced between the kitchen and our table, asking if we wanted to choose our wine or leave it up to him, all while crafting multiple courses to pair for our late-night feast. The primi was a stand out; the texture of the pasta was perfect.
I wanted to learn more about Luigi’s method, so we joined him in the tiny stone-walled kitchen for a lesson. He poured us chilled frappato by COS made down the street and showed us how to create his pasta dough using eggs from the agriturismo and semola flour from Arianna Occhipinti’s land, just around the corner. We made a giant batch of egg pasta dough in a free-form, organic way. We weighed the flour and counted the bright orange egg yolks. The amount of water added was determined by the weather and what was cooking on the burner behind us. We made pasta for all of the agriturismo’s guests for dinner service that night.
My recipe reflects Luigi’s method. The fat is controlled with the egg yolks, but the water and splash of olive oil are up to you. Pasta recipes should be about feel—it tells you when it’s done. While I never went to culinary school, and I never staged in Bologna, I have, however, taught thousands of pasta enthusiasts to understand the fundamentals of how to make pasta in their home, and I have yet to get any complaints.
Conditions
Humidity: 64% (Alameda, CA)
Dough: 50% hydration
Yield: 1 lb. pasta
Tools
- Fork
- Bench scraper
- Scale (grams)
- Flat rolling pin (mattarello) or pasta sheeter (crank or electric)
- Gnocchi/cavatelli board (optional)
- Chef’s knife
- Pasta wheel, crimped or straight edge (optional)
- Semolina flour (for dusting)
Ingredients
- 300 g. semola flour (Caputo brand is available online)
- 54 g. egg yolk (3) of large eggs
- 92 g. water, room temperature
- 4 g. olive oil
Missing ingredients? We got you.
Find and support independent producers, farmers and purveyors in your local area with our crowdsourced directory, Supply Home Cooks.
Mixing
- Pour flour into a high mound on a large flat surface.
- Using the back of your fingers, in a light fist facing down, create a well with approximately a 6-inch diameter with high sides. It’s okay to see the bottom of the surface.
- In two small bowls, separate egg yolks and egg whites.
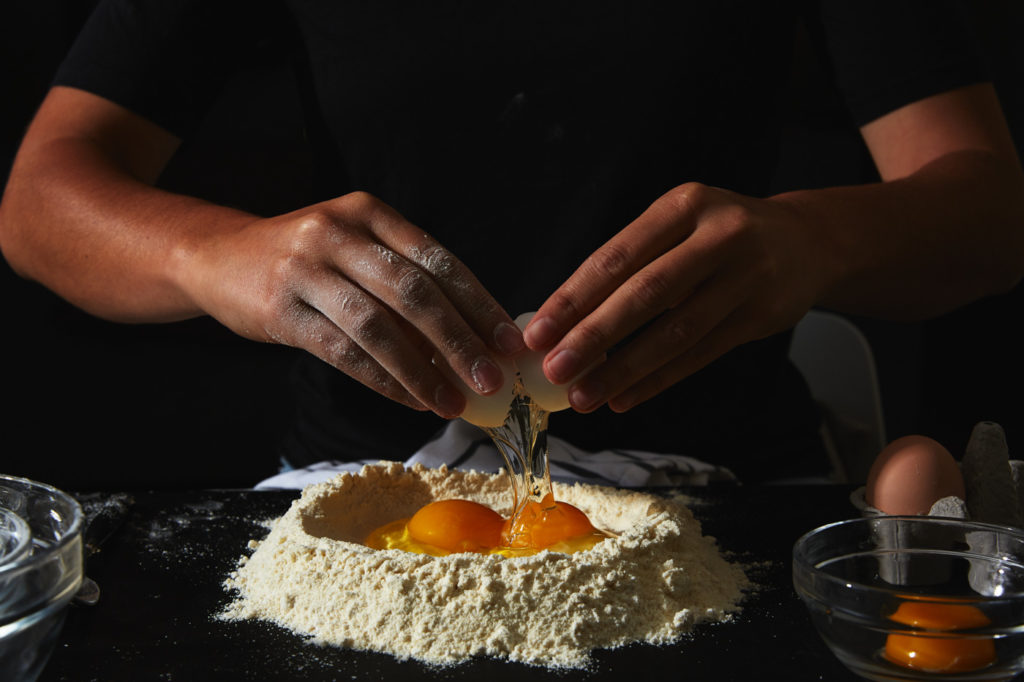
- Pour egg yolks into well, along with olive oil and ¾ of your water (see photo 1).
- Using a fork, break up egg yolks and start to whisk the egg yolks into the water and olive oil until mixed well—as if you’re prepping for scrambled eggs.
- Slowly start incorporating flour from the side of well, bringing in more to create a wet batter. Add more with your hand or bench scraper to incorporate the flour with the wet mixture.
- Using the bench scraper, scrape dried flour and fold over to center pressing down on dough to bring together.
- Depending on the humidity, you can add remaining water and continue scraping and folding over with the bench scraper. This recipe was made with 64% humidity outside; the current humidity can be found on your iPhone Weather app. If the humidity is significantly higher where you are, the rest of the water might not be necessary—and the opposite for a low-humid climate. You are looking for a dry-to-the-touch dough, but wet enough to absorb all of the flour.
- Start chopping the dough with a bench scraper to expose the wet areas to press down on the remaining flour.
- Use wet parts of dough to scrape up dried flour and pieces. Clean your surface with the dough ball.
Kneading
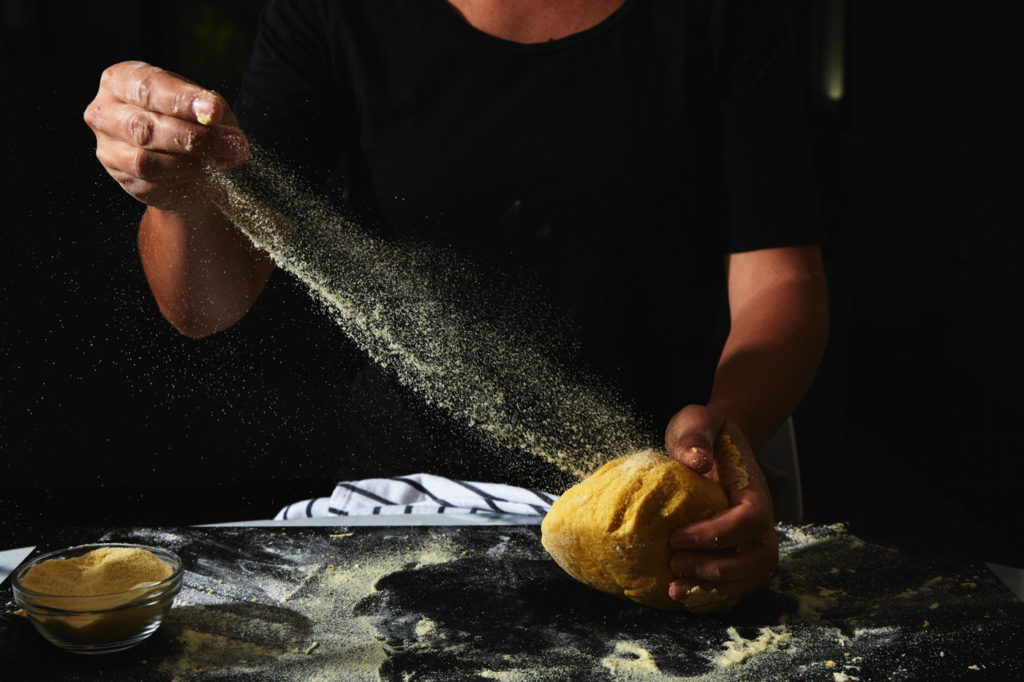
- Shape the dough into a ball and using the heel of your hand push down and forward as if you’re pushing it away (see photo 2).
- Using your opposite hand, rotate the dough slightly clockwise (or counter-clockwise) and fold the top of the dough back toward you; repeat the heel of your hand pushing down and forward.
- Continue to rotate in the circular motion. Try to find a rhythm with this; the heat and pressure of your hands and movement are what make this dough come together. Ten minutes, at least!
- If the dough is too hard to work with, wrap it tightly, wait 5 minutes, and come back to it. This dough isn’t easy at first; you’ve really got to work for it.
- The dough will smooth out—no more dimples or rips—and when you push your thumb in, it will reform itself.
- When finished kneading (you can’t over-knead—more is better), wrap the dough tightly with plastic wrap, making sure there is no way for air to get in.
- The dough should rest between 30 minutes to 4 hours at room temperature. If you’re not planning on rolling out the dough in that timeframe, put it in the fridge and make sure it returns to room temperature before rolling it out the next day. Don’t keep it for longer than that; it will oxidize and the color isn’t pleasant.
Rolling sfoglia (pasta sheet) with machine
- Cut dough into quarters. Take 1 quarter and rewrap the 3 remaining pieces tightly.
- Roll out pasta dough with a rolling pin until it’s uniform, about ¼-inch thick. Feed the thick sheet of pasta through the pasta sheeter at its widest opening (this is usually the highest number setting), using your opposite hand to help guide it out of the bottom of the feeder.
- Roll dough through each setting twice, ensuring bubbles are flattened and the dough is becoming more uniform; fold if necessary.
- Keep feeding pasta dough through all settings until the second to last setting. Mine is at setting number 2. You should see your hand clearly from the other side of the pasta sheet.
- This dough shouldn’t need to be floured. If it is sticking, dust a little semolina flour evenly. It’s important not to over-flour if you are planning on making the farfalle or garganelli; too much flour will prevent dough from sticking to itself.
Rolling sfoglia (pasta sheet) by hand
- Cut dough into quarters. Take 1 quarter and rewrap the 3 remaining pieces tightly (depending on your counter space and experience, you can definitely build up to doing half of the dough or even the full ball).
- Dust work surface lightly with semolina.
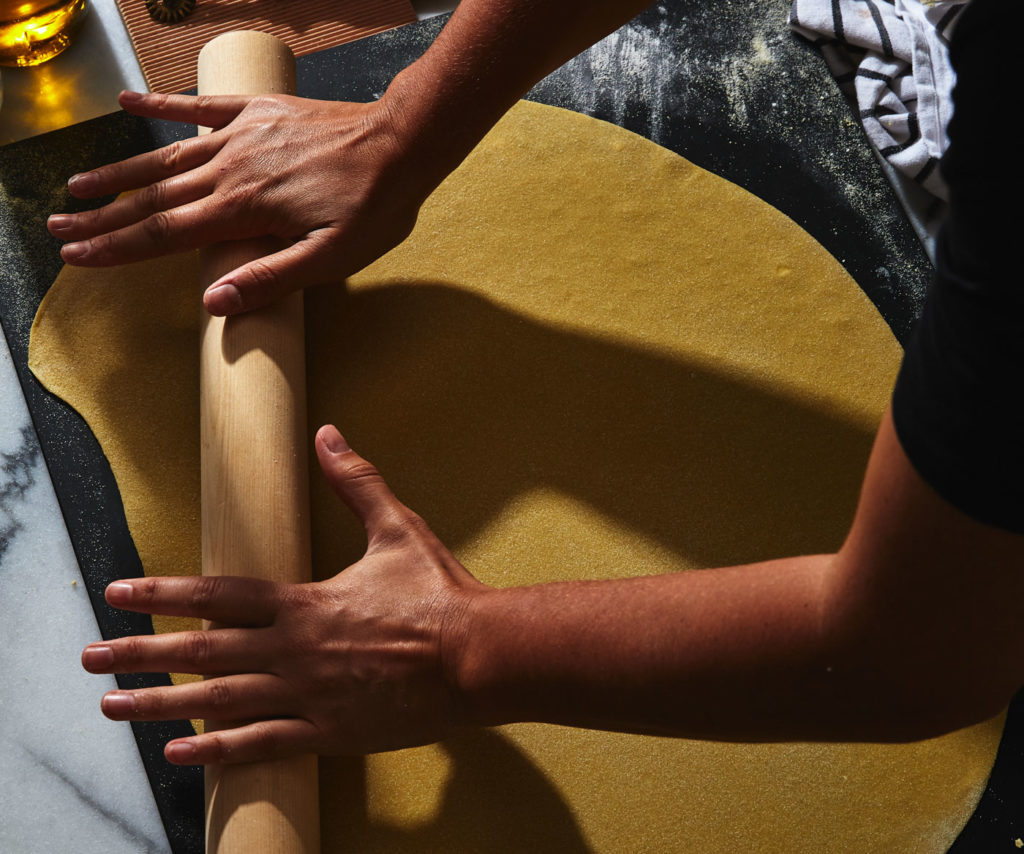
- Using a mattarello (Italian pasta pin) or a flat rolling pin, start in the middle of the dough and push forward; then once back in the middle, roll toward you (see photo 3).
- Rotate dough 90 degrees and repeat.
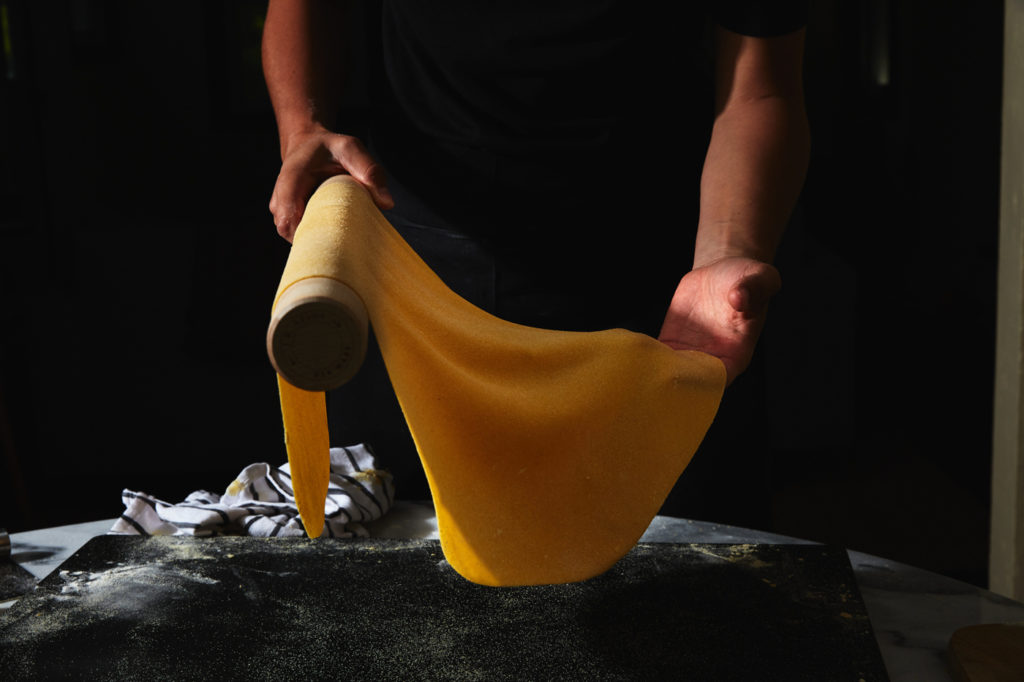
- Keeping the dough round and a consistent thickness in the beginning makes this process a lot easier as it gets thinner (see photo 4).
- Continue rotating and rolling forward and back sliding your hands along the mattarello in the motion of the dough’s shape. Meaning, as you start from the center of the dough, your hands will slowly move toward each other as you’re reaching the top of the sfoglia.
- If the sfoglia is getting too large, lay the mattarello at the top of the sfoglia and gently roll dough over toward you to move and reposition the sheet.
- The smaller pieces should fit just fine, but if you’re feeling adventurous and are using a larger piece, you can let the thinner sfoglia hang off the work surface to focus on the top portion, then rolling the dough over the mattarello to move and rotate again and again.
- You’re looking for 1/16-inch thickness for the tagliatelle, garganelli and farfalle. You should see your hand clearly from the other side of the dough.
Shape #1: Farfalle
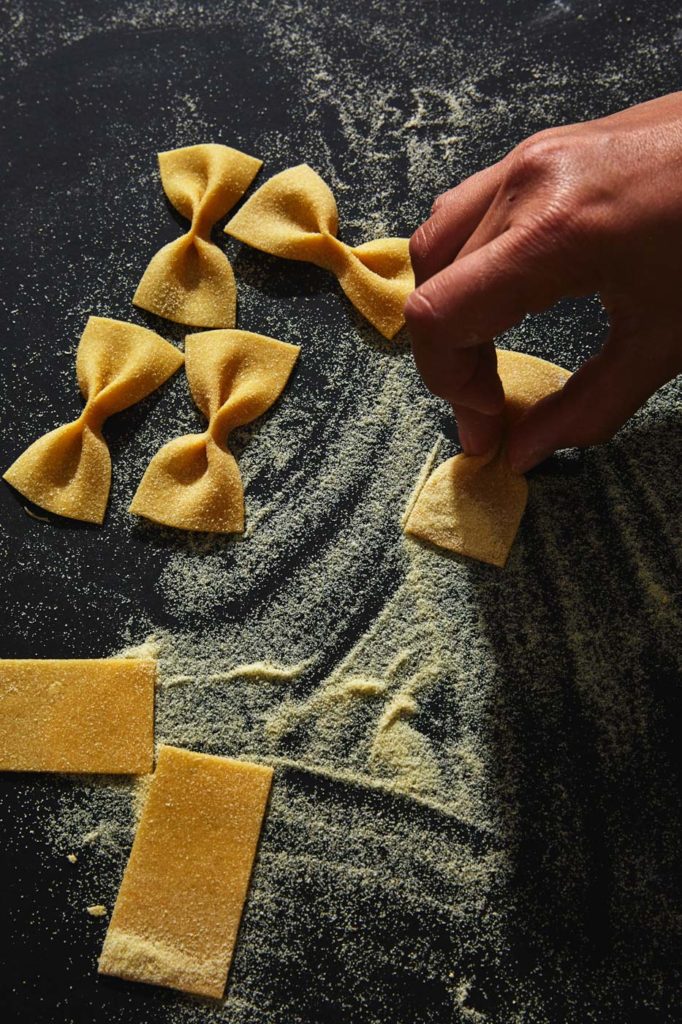
- Using a chef’s knife or crimped pasta wheel, cut 2 ½ by 1 ½-inch rectangles.
- With the rectangle horizontally in front of you, using your dominant hand, place your thumb on the edge of the bottom center, index finger in the center, and middle finger on the top edge—all aligned vertically.
- Holding the dough down with your index finger in the center, pinch both edges with your thumb and middle finger toward the center until even folds form. It might take a few times going slowly to get the hang of it (see photo 5).
- The idea is to pinch together the top layers of the fold to create a little hole underneath. This ensures the pasta will cook evenly and sauce can hide in there.
Try it with this sauce
Charred Cauliflower with Colatura di Alici
This sauce is typical of Cetara, a tiny anchovy fishing village on the Amalfi Coast. The surface area of farfalle is ideal for being coated with emulsified colatura di alici and olive oil—so simple, but packed with flavor and aroma.
Charred Cauliflower
Ingredients
- ½ head of cauliflower, cut into tiny florets
- 20 g. olive oil (2 tbsp.)
- 5 g. kosher salt (1 ½ tsp.)
Method
- Heat oven to 450℉.
- In a medium bowl, add cauliflower florets, olive oil and salt; coat evenly.
- On a parchment-lined sheet tray, spread cauliflower evenly.
- Roast for 7 to 13 minutes. You’re looking for the cauliflower to brown on the edges.
Colatura di Alici Sauce
Ingredients
- 60 g. olive oil (6 tbsp.)
- 30 g. colatura di alici (3 tbsp.)
- 3 g. garlic (2 tbsp.), peeled and minced
- 7 g. fresh Italian parsley (2 tbsp.), minced
- 6 g. Calabrian chili paste or crushed Calabrian chilies in oil (2 tsp.)
Method:
- In a large mixing bowl, add all ingredients and mix together.
To Finish
- Heat a shallow sauté pan with water, ¾ full.
- Just before water begins to boil, add about a tablespoon of kosher salt.
- When the water is boiling, add fresh farfalle. Using tongs, gently move the pasta around to prevent it from sticking.
- While farfalle is cooking, ladle 3 ounces of pasta water into a large bowl with colatura; whisk together.
- When farfalle begins to float, using a large spider strainer, scoop out farfalle and add to the colatura bowl. Be gentle with the pasta, but mix quickly to emulsify the sauce.
- Mix in charred cauliflower. Garnish with parsley.
Shape #2: Garganelli
(Gnocchi board and mini rolling pin required)
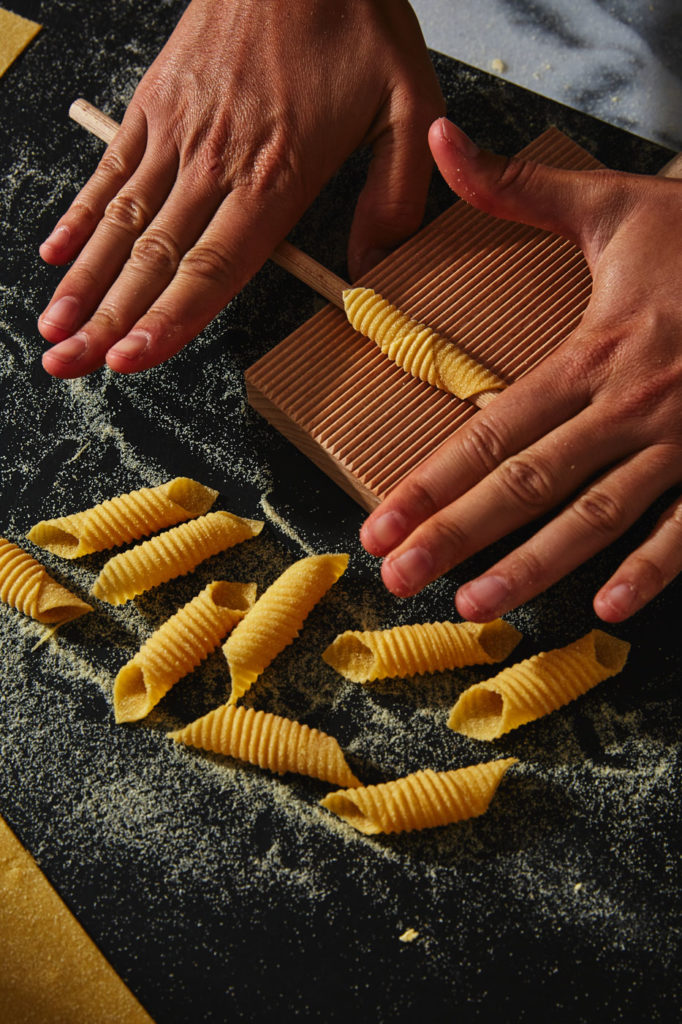
- Using a chef’s knife or pasta wheel, cut a 2-inch by 2-inch square.
- Place the square like a diamond on a flat cavatelli/gnocchi board.
- Place a mini rolling pin horizontally ½ inch from the bottom point.
- Fold bottom point over the rolling pin so that it wraps around (see photo 6).
- When the bottom point is under the rolling pin, press down and continue using pressure as you roll forward.
- Garganelli should slide right off the rolling pin.
- If the dough is sticking, lightly sprinkle semolina flour on the gnocchi board and on the top of the dough before rolling.
Try it with this sauce
Blistered Sungolds with Basil Gremolata
This sauce is inspired by the sweetness of in-season sungolds, summer garlic and basil. The spice from garlic balances this sauce and the garganelli traps all of the strong flavors inside.
Blistered Sungolds
Ingredients
- 1 pint sungold tomatoes (any ripe cherry variety will work)
- 40 g. olive oil (4 tbsp.)
- 6 g. kosher salt (2 tsp.)
Method
- In a large sautè pan, heat olive oil over medium-high heat.
- When the pan starts to heat, lower to medium and add sungold tomatoes.
- Add salt and stir. Keep moving the pan so the tomatoes are coated in hot oil.
- After 5 minutes, tomatoes will soften and collapse. Remove pan from heat and set aside.
Basil Gremolata
Ingredients
- 1 bunch basil (Genovese or Thai), minced
- 3 g. garlic (2 tbsp.), peeled and minced
- 4 g. lemon zest (2 tsp.)
- 10 g. lemon juice (1 tbsp.)
- 20 g. olive oil (2 tbsp.)
- 1 g. kosher salt (1 tsp.)
Method:
- Add all ingredients in a large bowl and mix until combined.
To Finish
- Heat a shallow sauté pan with water, ¾ full.
- Just before water begins to boil, add about a tablespoon of kosher salt.
- When the water is boiling, add fresh garganelli. Using tongs, gently move the pasta around to prevent it from sticking.
- When garganelli starts to float, using spider strainer, add pasta to the gremolata bowl and mix rapidly, adding pasta water to loosen if necessary.
- Garnish pasta by spooning blistered sungolds on top. This pasta would only get better by adding a fresh soft milk cheese, like stracciatella or mozzarella.
Shape #3: Tagliatelle
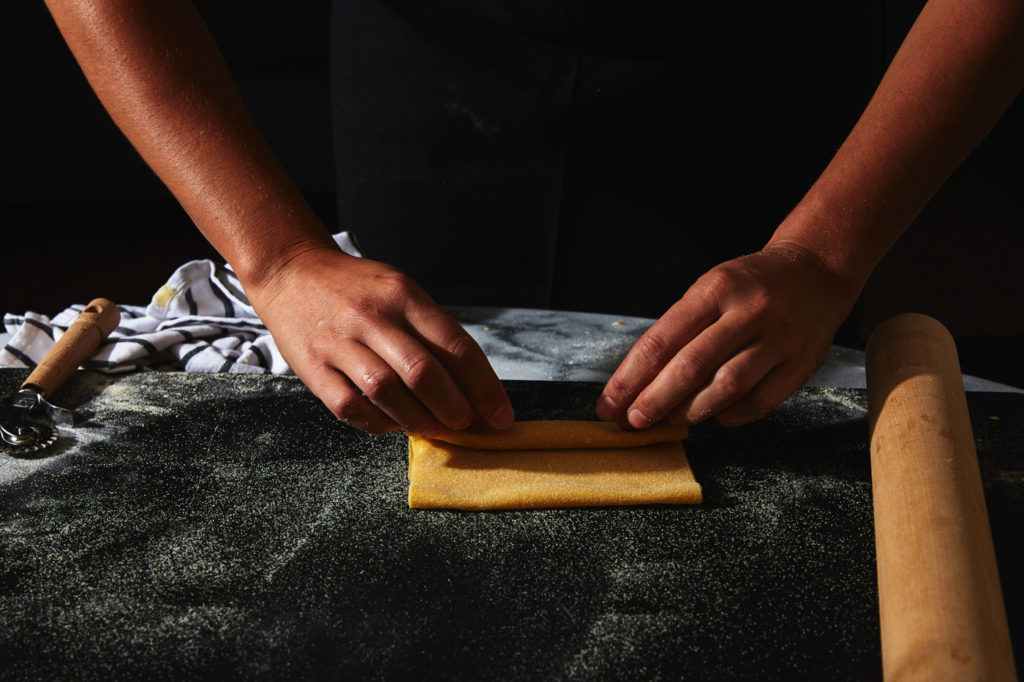
- Sprinkle semolina on a work surface and on top of the sfoglia.
- Fold 1 inch up from bottom and continue to fold until all sfoglia is rolled up (see photo 7).
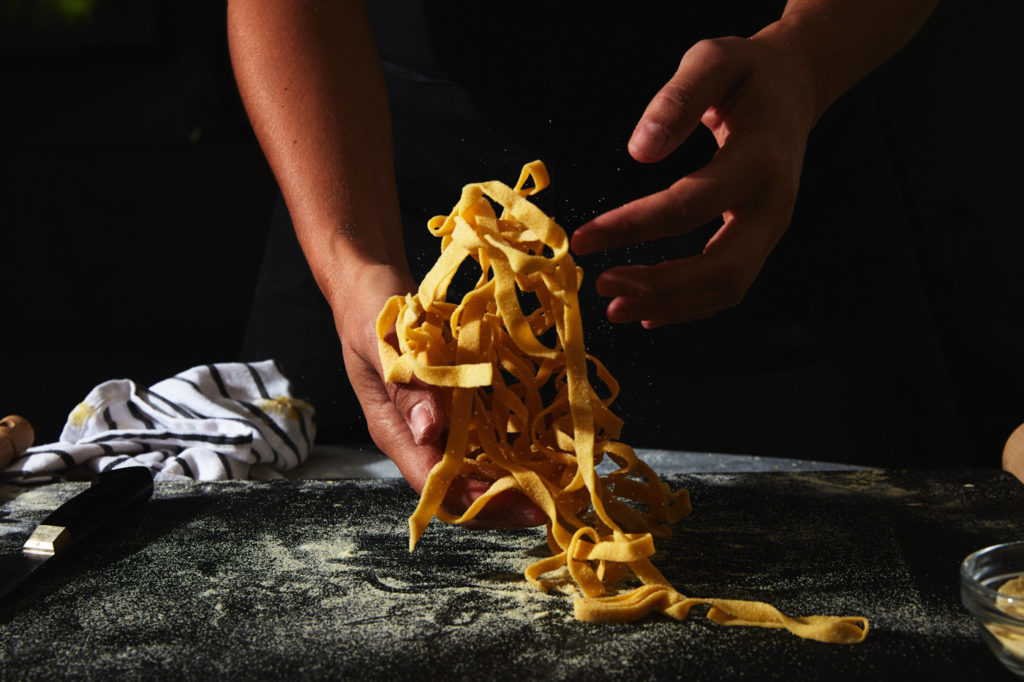
- Using a chef’s knife (which needs to be sharp), slice noodles approximately ¼-inch wide.
- After slicing, quickly lift up the noodles. Gently break them apart if any are stuck together (see photo 8).
- Continue to add semolina as you’re lifting the noodles to make sure all are coated to prevent them from sticking together.
Try it with this sauce
Caramelized Fennel with Garlic and ‘Nduja Breadcrumbs
Thinly sliced caramelized fennel tangles with the tagliatelle, making sure every bite is balanced with salty, sweet and spicy from the ‘nduja.
Breadcrumbs
Ingredients
- 20 g. olive oil (2 tbsp.)
- 10 g. ‘nduja (1 tbsp.)
- 1 g. garlic (1 tbsp.), peeled and minced
- 80 g. freshly toasted breadcrumbs (¾ cup), unseasoned
- 3 g. kosher salt (1 tsp.)
Method
- In a large pan on medium heat, add olive oil and ‘nduja. Break apart, and cook for 2 minutes.
- Add garlic; stir for 30 seconds.
- Add breadcrumbs, mix to coat, and add salt. Cook for 5 minutes or until lightly toasted.
- Remove from heat. Spread evenly on a sheet tray to cool and set aside.
Caramelized Fennel
Ingredients
- 100 g. fennel (1 ¼ cup), halved and thinly sliced
- 20 g. olive oil (2 tbsp.)
- 15 g. Parmigiano Reggiano (1 cup), finely grated with microplane
- 3 g. kosher salt (1 tsp.)
Method:
- In the same large pan as the breadcrumbs, add olive oil over medium-low heat.
- Add fennel and stir. Cook for 5 minutes.
- Add salt. Stir and lower heat to low for another 5 minutes.
- Add grated parmesan in batches to incorporate.
- Cook for 5 minutes more, or until parmesan and fennel begin to lightly brown and caramelize.
- Garnish with 3 caperberries, sliced very thinly (chopped capers will also work), fennel fronds from fennel bulb, and olive oil.
To Finish
- Heat a shallow sauté pan with water, ¾ full.
- Just before water begins to boil, add about a tablespoon of kosher salt.
- When the water is boiling, add fresh tagliatelle. Using tongs, gently move the pasta around to prevent it from sticking.
- In a large pan with fennel, add 4 ounces of pasta water and stir, raising heat to medium. The sauce should begin to simmer lightly.
- When the tagliatelle is all floating, remove noodles with tongs. Place in the fennel pan and begin to stir rapidly to emulsify the sauce and coat all the noodles.
- In pasta bowls, portion out noodles, sprinkle caperberry slices, a generous amount of breadcrumbs to coat each serving, and a few fennel fronds to top it off.
- Drizzle with fragrant olive oil.
Shape Storage
- Lay out pasta flat on semolina flour-lined baking sheets and freeze in a single layer.
- Once individually frozen, add to a freezer-safe bag or container (the less oxygen the better).
- Freeze pasta for up to 3 months.
- Pasta will cook the same when frozen; simply add another minute or two to cook time.


Our comments section is for members only.
Join today to gain exclusive access.